Showing posts with label Organization. Show all posts

Wednesday, March 10, 2021

Paper Pumpkin Alternatives for February

 I have finally gotten my crafting room somewhat organized.  At least I have room at my desk to make a few cards!  I bought a rolling cart from Michael's and put a lot of items on it.  These carts are really handy.  The one I bought has hooks on the sides, a little basket, and rods to hang ribbon on.


a clean desk!!

It felt good yesterday to sit down at my desk and make a few cards.  I really like this month's Paper Pumpkin. and ended up making several cards with the kit.

The vellum piece is gold on the other side but I preferred the softer look and flipped it over.  I did the same thing with the doily.  It is gold on the other side.  I cut it in half and now can use it on another card.  I used the SU Blends to color the flowers.


This was super easy to make!  I love the look of the white embossed flowers on the black cardstock background.  


I cut the floral piece in half to use it on another card.  Notice the other half of the doily on this card also.


For this card, I used the Blending Brushes to color the white doily with Roccoco Rose ink.   This is one of the three sample cards made with the kit instructions - minus coloring the doily.


This is one of the cards that was made using the instructions in the kit.  The only change I made was to use the white side of the vellum instead of the gold.


This card was also made using the kit instructions.  I didn't change a thing.

Friday, January 22, 2021

Organization is the Bomb!!

Pick yourself up off the floor .... I'm writing on my blog!  I have not made a card in about a month!!  Instead I have been trying to get my craft room organized!  I have made pretty good progress.  I took all my stamp sets out of the plastic boxes and put them in Avery Elle Stamp & Die Storage Pockets.  So far, I have emptied out close to 200 boxes!  I am not sure what I am going to do with all those boxes though!  I know some of them will be useful to put sequins, pearls, etc in.  I made dividers to categorize the stamps & used my Brothers P Label maker to label all the stamps, dies and dividers.  For storing my stamps, I bought an InterDesign Fridge Split Binz from Amazon.  It holds almost 150 stamps without the dies but I put the dies and the stamp set together inside the Avery pockets to make them easier to find.  I already had most of the stamp sets listed in Evernote (a free organizer app) so it was just a matter of putting each stamp set into one of the categories.  My next thing is to label and organize my Paper Pumpkin stamps so I will use them more.  I haven't tackled my wood stamps yet.  I am going to take a good look at them and see if I really need them.  They have been sitting in my attic room for a few years so I'm guessing I really won't miss most of them!  But it is not hard to take them off the wood blocks - if they don't peel off easily, stick them in the microwave for about 20 seconds and they should come off.

One bin full!  There are 100 stamp sets in this one container!!

Just a few of the empty boxes.  I have the rest in the attic room to figure out what to do with them.

These are stamp sets that I labeled "Greetings"  Not sure if I'll break that category up in sub-categories.

These are all the stamps that I have done so far - just missing wood sets & Paper Pumpkin.  They take up 2 shelves .... before all my stamps were on 5 shelves!

This is the second container with still a lot of room available.

I bought these plastic file folders at WalMart.  50 in a pack but when you cut them apart, you get 100!

I cut the folders apart and rounded the corners.  I used the Brother P-touch for labels on dividers and stamps - so easy!


This is the back of the stamp set pocket.  I buy magnetic vent covers at Lowe's Hardware  (8" x 15") and cut them apart to stick my dies on.

This is the front of the stamp set pocket with the label at the top.  

My thanks goes to Jennifer McGuire who has some great organizer tips plus some great cards that she makes.

Let me know what you think!!

Thursday, May 28, 2020

Stampin' Up! Blends Organization

I am so excited today .... I am getting my hair cut!!  It has been way too long.  I've been wishing I had long hair so I could just pull it up in a pony tail.  I have to admit a couple of times I've gotten out my Stampin' Up! shears and taken a little hair off the sides and top.  Who knows what the back looks like.  Sonny's is bad too.  He stopped by Great Clips yesterday to see if he could get a cut and I'm sure they laughed in his face.  They told him it was a 2 1/2 hour wait and would be that way for a couple of weeks!  Heaven forbid that he let me make an appointment for him with the gal who does my hair but that would cost too much for him (or so he thinks!)

Well, our NC Quarterly meeting has been canceled.  It was originally scheduled for early June and it got moved to July 25.  Now it is moved to June 2021!  And I have all my swaps almost done!  Not sure yet what I will do with all of them.  I'll probably look around for someone doing a mail-in swap and sign up for one of those.  One of the NC demos is working on an idea for a Facebook Virtual Shoebox swap along with some of us doing Facebook Live videos of projects.  I have agreed to be a presenter .... now I just need to figure it out!

Yesterday I worked on a project to make it easier to use my Stampin' Up! Blends.  I have them on my desk in a acrylic cosmetic holder.   Since I have filled up the cosmetic holder up, I am planning on ordering the Stampin' Up! Blends holders with my next order.  You get 5 storage trays for $14.


Anyway - back to yesterday's project.  I used a PDF file that another demo had posted that printed out all the color of the Blends so when they are laying on their side in the holders, I can see the names of each Blend without having to pick every one up to read the color on the side. 


I printed the PDF on white cardstock.  I put scotch tape on top of the printing to protect them a bit and used a small circle punch to punch each one out.  Then I adhered each one to the Blends lid with a glue dot.

Tuesday, April 21, 2020

Ribbon, Ribbon, Ribbon!

I love bright colors.  So, this first card fits the bill.  These two cards made with the Ride With Me stamp set can be used for just about anyone - young or old.


I started out with a Real Red base. I cut strips measuring 3 3/4" x 3/4" in Daffodil, Bermuda Bay, Real Red, Gorgeous Grape and Granny Apple Green and adhered them to the Whisper White.   I tied a piece of ribbon around the white piece and then adhered it to the red card.  I cut out a piece of watercolor paper with the Stitched Rectangles Dies. I stamped the truck and balloons with Versamark and heat embossed them with black powder.  I water colored the truck and balloons using the ink refills and my Aqua Pen.  When all was dry, I attached the water colored piece to the card with dimensionals.  I just wish I had a stamp of a lady or man to put in the driver's seat!  We used to have a set called Loads of Love that had the people stamp in it but I think I must have sold it. Oh well!


This card is the same except I used all retired colors.  The colors I used on it were:  
Card Base - Peekaboo Peach, Lemon Lime Twist, Wisteria, Turquoise, Rose Red and Plum.

I have a lot of ribbon!  During this isolation period, I worked on getting my ribbon somewhat organized.


I used to try to keep my retired ribbon separate from SU current ribbon.  Well, over time, I probably have about 5 spools of ribbon that are current and the rest is retired.  I have pretty much given up on separating them since Stampin' Up retires almost all the ribbon selections each year.  So, I decided to put all the colors together.  Now I know that I have about 8 spools of white ribbon and only 2 rolls of red!  But all of it in the picture above are Stampin' Up ribbon whereas the most of the ribbons below are not Stampin' Up.


This way of displaying my ribbons helped me out with these cards.  I knew I wanted to have a ribbon on the cards so I checked my ribbons first to determine what colors I had.  Since I had a full spool (almost) of Perfect Peach ribbon, I colored the truck peach!  Same for the Real Red spool of ribbon.

Friday, April 3, 2020

Organize with Evernote!

I'm pretty proud of myself!  I have entered all my stamps - retired, current and paper pumpkin and my dies - into the Evernote program (free!)  I even entered the new stamp set I received on Monday!  Now to keep up and keep them organized!

These are my retired stamps!  It's funny - while I was entering them into Evernote, I reacquainted myself some of the oldies but goodies and pulled 3 or 4 out to make cards with.

These are my dies / thinlits.  I have to admit I have a few more of them that I haven't entered yet.  That's tomorrows job.  I had them in a basket but they outgrew their basket so I moved them to this plastic tub.

These are my current stamps!  My retired definitely outnumber the current.  And in another couple of months, I will be moving some of these over to the retired side.  Actually there are 3 or 4 Sale-a-Bration sets in this group that should actually be retired since Sale-a-Bration is over.

These are my Paper Pumpkin stamps.  I have them inside the clear envelopes that Stampin' Up sells.  On the side is a paper list of all the stamps so I can quickly look at it to see what I am looking for.  They are organized in the envelopes with the date and month and title of the stamp sets.

Here are a few cards I made from an old Paper Pumpkin kit from December 2016.  It was meant to be a journal and came with a Rotary Stamp instead of photopolymer stamps.  It included patterned paper and printed window sheets.  I didn't need a journal or scrapbook so made them into cards.


Wednesday, August 28, 2019

The Gift of Fall - part 2

I'm on my own for a few days while Sonny has gone to Pinehurst to play golf with a group from Newcomers.  That man is a golfing fool!!!  He plays golf usually four times a week and just can't get enough.  I've been trying to put some organization into my card collection.  I am trying to sort them into categories so when I need a card, I can find it and not have to dig through tons of cards.  I also need to donate a bunch of cards to some organization - I just have too many!!!  Got any ideas?   

Can you believe it's already the end of August?  Wow, this summer has flown by.  Ashley is coming to visit this afternoon.  She has some vacation that she needs to use so I am happy that she has chosen to spend some time with her mom and dad!  Plus, she is hoping to take a couple of pieces of furniture back with her.  Not sure if both will fit in her card but we are going to try.  My mom is giving her a buffet table that was my grandmothers and Marianne is giving us a china hutch that belonged to mom's cousin.  She found the receipt in the drawer when she was cleaning it out this weekend.  They paid $125 for it in 1948 and paid it on an installment plan!  I'm guessing $125 was a lot of money back then!  We'll see how well Sammie and Bogart get along this time!  Hopefully good!

Thought I'd share a few more of the August Paper Pumpkin kit, The Gift of Fall.


The blossoms for this card are vellum and just beautiful.  I fussy cut the Crushed Curry circle in the center and used the Stitched Shapes die for the sentiment piece.  I used a dauber for the "happy birthday" with Crushed Curry and Mango Melody inks.

For this card, I first used my Aqua Pen and inks (Curry, Razzleberry and Mango) to watercolor the background (onto watercolor paper.)  Then I stamped the girl from Beautiful You and colored her dress with Lovely Lipstick ink.  The sentiment just barely fit onto the Crumb Cake label that was included in the kit.


I stamped the birds from Free As A Bird onto white cardstock and fussy cut it.  The leaves and circles are included in the kit.  Stamp a simple sentiment on a banner and voila! a finished card to mail.


For this card, I cut one of the colorful leaf tags in half and adhered them to the Thick Whisper White cardstock.  I tucked a vellu leaf and one of the vellum blossoms under the sentiment banner (which is the Crumb Cake label just turned over.)  Add a bow and a few sequins and you are done!  The sentiment is from a retired stamp set, Trust God.

I hope you have enjoyed these cards and will try and duplicate a few of them using your own products.

Monday, February 11, 2019

Meant to Be not a Valentine!

I am really loving this heart set.  I don't usually purchase Valentine stamp sets but I made an exception for this one because I just love the Be Mine Stitched Framelits.  I wanted to show you that this set is not just for Valentine cards.  This card can be for an anniversary, birthday, thinking of you, etc.


The card is Coastal Cabana with mat card stock in Lemon Lime Twist and Granny Apple Green.  I love this color combo!  I went through my stash of Designer paper - believe me, that took a while since I have too much!!  But, I found this piece that I think was a Sale-a-Bration DSP last year and used it across the card.  The cute scallop strips at the top and bottom are from a die in the Be Mine Stitched framelits. I stamped the heart and sentiment in Melon Mambo.  I die cut a heart from Vellum to soften the Coastal Cabana dotted heart.

What do you do with all your Designer Paper scraps?  Toss them, store them, use them???  I decided last year that I had too much and I was always searching for a certain color and taking forever to find it.  So, I cut almost all of my DSP into 6x6 squares and threw away the tiny pieces that I had been holding onto.  I put them in some sturdy plastic bags (14"x14" that I think I got from Amazon) and separated them into color groups (blue, pink/purple, green, yellow/orange, etc.)  The hard part is deciding which side you want to use - for instance in my green bag, one side of the paper is green and the other is blue.  I just picked the side I thought I would use the most.  Now at least when I am looking for a piece of DSP to match what I am making, I can limit my search!


Wednesday, July 5, 2017

Ribbon of Courage

Hope you had a great 4th of July.  Ours was pretty quiet this year.  My mom stayed with us Friday and Saturday nights and I took her to Camp Dogwood on Sunday afternoon.  This is a great summer camp right on the lake (and about a 10 minute drive for me) for the blind and visually impaired.  This is mom's second year to attend and I hope she enjoys it this year as much as she did last year.   Although she got off to a rocky start.  She found out last week that her friend and roommate was not going to be able to come per doctor's orders.  She was not so sure about rooming with someone she didn't know!  When I got her registered, one of the counselors, Jeff, came up to her and welcomed "Miss Becky" back.  He told her he was not her counselor but he was going to take her to her room and get her settled.  Along the way, they met up with her new roommate who seemed very nice to me. Jeff told mom he was saving a place for her at dinner that night.  He told us that mom was the best camper he had ever had!  And mom told me Jeff was the very best counselor.  He took her tubing last year and she was quite impressed with him.  She was supposed to do archery today - that should be interesting!  A blind person trying for the bulls eye!

Saturday night we drove into Mooresville to have dinner at a restaurant on the lake where we hoped to watch the fireworks after eating.  Well, we waited for 2 hours - until 10 pm! for the fireworks show with nothing happening!  It had been raining earlier in the evening so we figured it was too wet for them.  So, we returned home.  I called on Sunday and was told they have rescheduled them for next Saturday, July 8!  Strange!!  Last night we planned on going to Mooresville again for the YMCA's fireworks.  Well, it started pouring down rain about 6 and when we went outside to get in the car around 8:30, it was still raining so we went back in the house.  I think they did have the fireworks around 9:30 but we weren't there.  So tonight, we just watched the fireworks on TV from New York!!  Better luck next year - or next Saturday!!

I had time today to play with a new stamp set - Ribbon of Courage - that I knew I had to buy as soon as I saw the new catalog.  This stamp set was inspired by Million Dollar Achiever Patty Bennett in memory of her mother.  


This card uses a technique with Glossy Cardstock again similar to the Oh So Eclectic card I did last week.  I sprayed the glossy cardstock with the spritzer filled with alcohol.  Next I dropped 2-3 drops of reinker (Peekaboo Peach and Bermuda Bay) and let it run.  To help it spread around, I sprayed more of the alcohol.  I used a tissue to pick up some of the ink that pooled along the edges.  I love these colors together!  Who would have thought?!  I stamped the hearts with Archival Black ink and used markers to color the flowers and Wink of Stella to make them sparkle! 


This next card made me think of my sister, Debra.  I miss her every day!  She was actually my step-sister (we shared a dad) and we didn't get to know each other until the mid 70s when I moved to Texas where she and my dad lived.  There was about a 10 year gap in our ages (I'm the oldest!) but that didn't matter. We both had a daughter and a son that were the same age (within a few months) and we used to take family camping trips together.  She was diagnosed with Stage 4 breast cancer shortly after I moved to Washington state (2003).  The last trip we took together was when she and Jack (husband) came to visit us at our new home in Washington.  The 4 of us went to Victoria, Canada for a few days and had such a good time.  They were supposed to come visit us in NC for Thanksgiving but sadly, that was not to be.  She died at the age of 50 (too young!) November 16, 2007. Can't believe it has been 10 years.

We had this picture made shortly after her hair grew back in from the treatments.


OK - back to the details of the stamp set.  I used the new in-color, Powder Pink with Basic Black card stock and love how it pops!  I stamped the ribbon with Memento ink and used my blender pen and the ink pooled in the lid to color the image.  The ribbon is cut out and a pink ribbon is cut out with the thinlet in the set and raised with dimensionals.  I love the sentiment.  It is so true - Live every moment - you never know when it will be your last so Live, Laugh and Love!


I have an organization tip for you.  I have always kept all my framelits and thinlits on a magnetic sheet and in their plastic envelope.  I filed them all in a basket in alpha order.  I often would not remember if a set had a matching die or not.  So now I am putting the dies in the box with the stamp set.  I have adhered a green sticker on the sets that have matching dies and written how many dies are in the set on the sticker.  That way, I can quickly count them to make sure I haven't misplaced one of the dies before putting the stamp set away.  I still have framelits in my basket - the ones that don't match a stamp set like the Stitched Shapes, Ovals, Circles, etc.  Maybe this will work for you.

IMG_20170628_180113350.jpg


Monday, April 24, 2017

Organizing my Craft Room!!

I have been trying to get my stamp room into shape.  I need to get it organized so I can bring in my new goodies and know where they are!  I told Sonny Saturday morning that I was going to work on my room and pull the vacuum out and clean it up.  Well, after almost all day Saturday and all day Sunday, he poked his head in and couldn't tell that I had done anything except make a bigger mess! You know how when you clean or rearrange, everything has to come out before you can figure out how to arrange it all again!  Most of that time was spent trying to organize my 12x12 DSP.  I had one whole unit of non Stampin' Up paper - some of it probably 12-15 years old.  I threw out a bunch of scraps or pieces that I knew I wouldn't use.  So I organized all that paper into another rack by colors (reds, orange, purple, neutral, etc.), put tags on the unit to identify the colors and put the larger scraps that are usable into baggies.  These are some wire racks that I got several years ago at WalMart.  I use plastic ties to locate the shelves where I need them.


Next I tackled my Stampin' Up DSP that I had in various places in my room!  My goal 
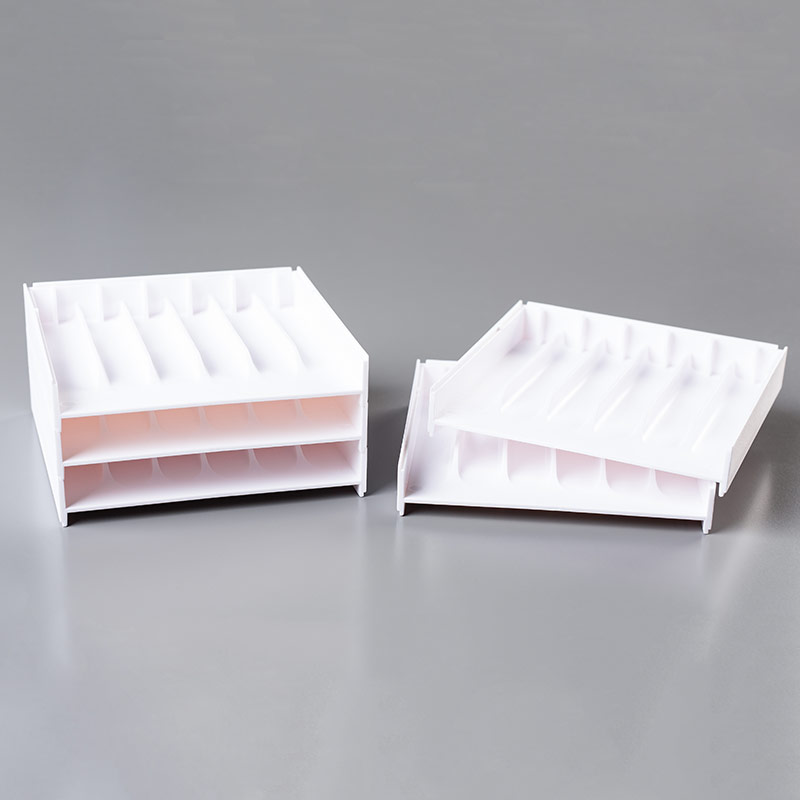
was  is to have it all in one place so I can find it when I want it.  I have made a good start with that but I still have a ways to go.  I actually thought I was done until I discovered I had another drawer full of DSP that I hadn't sorted through!  My plan is to find some kind of 12x12 plastic like envelopes to put the packs of DSP together when I order it so I will know which pieces go together and what card stock colors match.  I found some of the envelopes on Amazon.  They were pretty cheap - about $3.50 for a packet of 3 but they were not sold by Amazon but someone else through Amazon.  I put 7 of the packs in my shopping bag to see how much it would come to with shipping.  Well, they wanted $25 for shipping!!!  I promptly emptied my shopping bag and will be going to Staples this week to look for something I can use.  Here is the shelving for my DSP in a few plastic envelopes I already had.  They are a little too wide for the shelves so I will be looking for others.  The DSP in them is some that is current (as of now but not much longer).  Below in the small rack is the DSP that is retired.  I have separated it into colors.  At the top, is a small file box that I have 6x6 paper in (for now!)


I also found a good use for my Paper Pumpkin boxes!  If you turn them inside out, they are these kraft colored boxes and you can write on them, decorate them, etc.  For my use, I am storing different items in them and labeling them so I'll know where these things are!


I have a lot more Paper Pumpkin boxes to work with as you can see here -


I also worked on organizing my thinlits last week.  I'm still not sure about this method.  I am going to try it out for a while and see what I think. I have always put the thinlits onto a magnetic sheet and slid them back in their plastic envelope.   I kept my thinlits and dies in their plastic envelope with the name of the die written with a Sharpie at the top in a rectangle basket (and how many dies were in the packet) and I would just flip through them to pick out the one I wanted.  But I don't always remember what dies are in the packets.  Sooooo, I had an old photo album and slid the magnetic sheets into the plastic pages.  That way, I can look through the album to see all my dies/thinlits.  The only problem is my album is really bulging and a few of the thinlits won't fit in the pages.  I just have them in a small basket beside this album.


Instead of buying magnetic sheets, I buy these Magnetic Vent Covers at Lowe's or Home Depot. They are easy to cut to size and much cheaper.

I hope I have given you a few organizational tips.  PLEASE .... if you have any tips to give me, please do!!  I need all the help I can get!